
Building a secure above ground pool surround begins with engineered above ground pool deck plans. Sinking footings or ordering lumber without accurate dimensional blueprints causes dangerous code violations and costly material waste. A well designed platform provides seamless water entry, expansive sunbathing areas, and structural rigidity that withstands heavy swimmer loads. Most DIY builders spend between $3,800 and $12,500 on materials depending on platform footprint and lumber species.
However, above ground pool decks carry unique engineering challenges. Unlike a house patio, pool surrounds must remain entirely freestanding to prevent outward water pressure from damaging pool walls. In addition, exposure to chlorinated pool water accelerates fastener corrosion. This comprehensive master guide supplies tested above ground pool deck plans across four popular configurations. You will find exact post spans, joist cantilever limits, frost footing depths, stair geometry, and municipal code requirements.
Structural Comparison of Above Ground Pool Deck Plans
Every backyard layout presents specific elevation changes, pool diameters, and spatial constraints. Selecting the right framing schematic saves thousands of dollars in excess lumber and concrete footings. The comparison table below details four proven above ground pool deck plans. It compares square footage, lumber needs, build time, and material costs.
| Deck Plan Configuration | Square Footage | Footing Quantity | Beam & Joist Framing | Estimated Material Cost | Skill Level |
|---|---|---|---|---|---|
| Side Platform (Splash Deck) | 80 to 120 sq ft | 6 concrete piers | Double 2×8 beams, 2×6 joists @ 16″ OC | $2,400 to $4,200 | Intermediate DIY |
| Half-Round Crescent Deck | 250 to 380 sq ft | 12 to 16 concrete piers | Double 2×10 beams, 2×8 joists @ 16″ OC | $5,800 to $9,500 | Advanced DIY / Pro |
| Full 360-Degree Perimeter Wrap | 500 to 850 sq ft | 24 to 36 concrete piers | Double 2×10 beams, 2×8 joists with blocking | $11,500 to $22,000 | Master Carpenter / Pro |
| Multi-Level Terraced Living Deck | 400 to 650 sq ft | 18 to 22 concrete piers | Multi-height 2×10 beams, 2×8 joists | $8,900 to $16,500 | Advanced Carpenter |
Before digging footings, review our guide on how much does a pool deck cost. It analyzes labor rates and material pricing.
Related: Pool Coping Ideas: Modern Styles, Pavers & Costs
4 Tested Above Ground Pool Deck Plans
Successful builds depend on choosing a layout that complements your yard topology and entertainment needs. Below are the architectural blueprints and framing layouts for the four primary design archetypes.
1. The Side Platform Splash Deck (8ft x 12ft or 10ft x 14ft)
The side platform design remains the most cost-effective entry point for homeowners. This plan positions a rectangular sun deck adjacent to one curved edge of the pool. Swimmers climb exterior stairs onto the platform. Then, they enter the water safely via drop-in pool steps. Because the deck only touches a small arc of the pool rim, framing remains strictly perpendicular and rectangular.
Consequently, you avoid cutting complex bevel angles or trapezoidal decking boards. Six 6×6 support posts set in 12-inch Sonotube concrete piers easily carry the entire load. This plan accommodates two chaise lounges, towel storage, and a secure lockable safety gate. It is the ideal weekend project for DIY carpenters working with basic circular saws and framing levels.
2. The Half-Round Crescent Deck
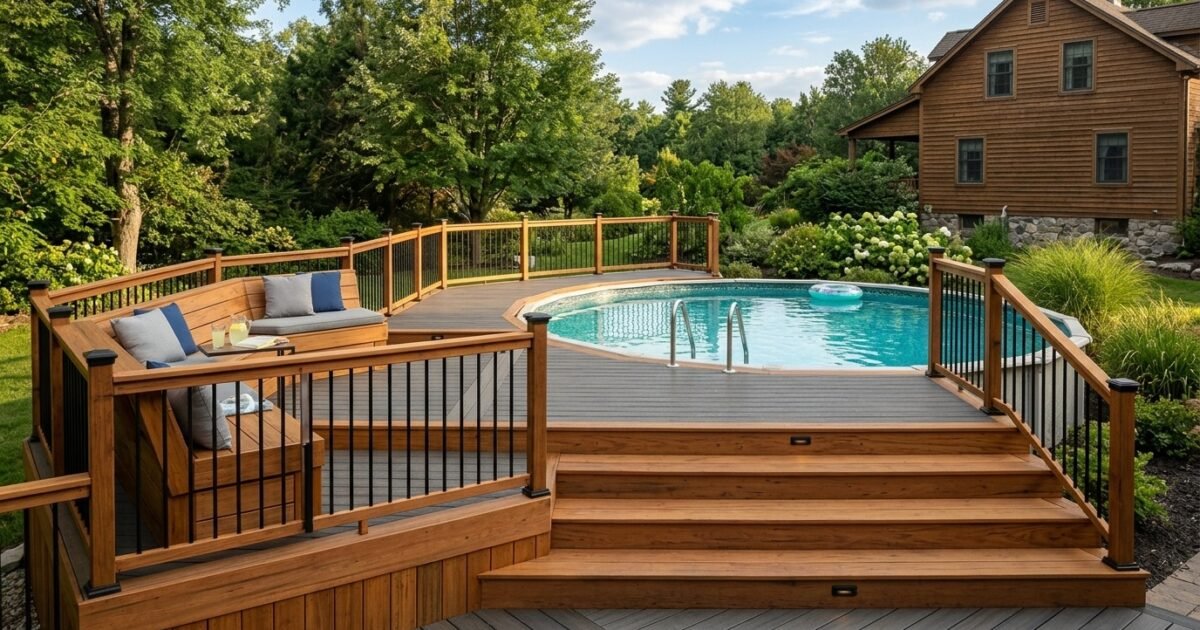
A half-round crescent plan hugs approximately 50 percent of the pool circumference. This layout transforms an above ground pool into an inviting backyard centerpiece. The curved platform provides generous lounging space. Meanwhile, the opposite side stays open for filter maintenance and winter covers. Framing a crescent requires radiating floor joists that fan outward from the pool perimeter like spokes on a bicycle wheel.
Alternatively, carpenters frame square modular quadrants. Then, they cantilever decking boards over the rail and trim the curve with a jigsaw. This plan requires 12 to 16 concrete piers spaced along two concentric radial beam lines. The inner beam runs 18 inches outside the pool wall, while the outer beam establishes the exterior railing boundary.
3. The Full 360-Degree Perimeter Wrap
The full surround plan wraps the entire pool perimeter in continuous decking boards. This ambitious layout completely disguises the steel walls of the pool, providing the visual elegance of an inground swimming pool. Swimmers can walk, run, and jump from any vantage point around the water.
However, full perimeter above ground pool deck plans demand precise radial framing geometry. The substructure consists of eight to twelve segmented trapezoidal bays linked by structural carriage bolts. Furthermore, you must incorporate removable trapdoors directly above the pool pump, skimmer box, and return jets. Without dedicated maintenance access panels, repairing a split plumbing fitting or vacuuming the skimmer requires tearing up finished floorboards.
4. The Multi-Level Terraced Living Deck
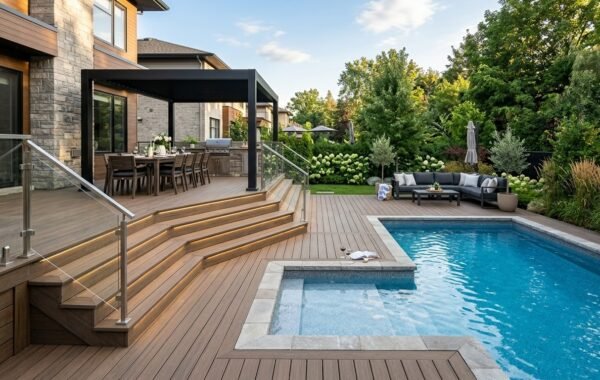
Sloped properties benefit enormously from multi-level terraced pool deck plans. Instead of building tall stairways from your porch, choose a multi-tier design. It cascades naturally across yard elevations. The top tier connects flush with your patio doors or kitchen slider, serving as an outdoor dining and grilling zone.
Then, a wide three-riser stairway descends to the intermediate pool entry platform situated level with the pool coping. Finally, a lower ground-level platform can house an outdoor shower, fire pit, or cushioned lounge area. Terraced framing isolates dynamic swimming vibrations from dining tables, creating functional outdoor rooms.
Structural Engineering: Post Spans, Joists and Footings
Residential pool decks must comply with the International Swimming Pool and Spa Code (ISPSC). In addition, builders follow the AWC DCA 6 residential deck guide. Residential decks must support 40 pounds per square foot (PSF) live load. In addition, codes require 10 PSF dead load. Pool decks endure crowded parties, splash weight, and jumping swimmers. Therefore, experienced builders design for 50 to 60 PSF live load capacity.
Lumber Sizing and Joist Span Table
Never guess lumber dimensions when planning deck spans. Undersized joists create springy, sagging floors that pull fasteners loose over time. The structural span table below lists allowable joist spans for #2 Pine and Fir lumber. It covers all standard joist spacings.
| Joist Lumber Size | Maximum Span @ 12″ OC | Maximum Span @ 16″ OC | Maximum Span @ 24″ OC | Maximum Overhang (Cantilever) |
|---|---|---|---|---|
| 2×6 Pressure Treated | 10 feet 9 inches | 9 feet 9 inches | 8 feet 3 inches | 12 inches |
| 2×8 Pressure Treated | 14 feet 2 inches | 12 feet 10 inches | 11 feet 0 inches | 18 inches |
| 2×10 Pressure Treated | 18 feet 0 inches | 16 feet 5 inches | 13 feet 6 inches | 24 inches |
| 2×12 Pressure Treated | 21 feet 11 inches | 18 feet 0 inches | 15 feet 9 inches | 30 inches |
Spacing joists at 12 inches on center significantly boosts load capacity. In addition, it improves floor stiffness. When installing composite boards instead of wood, choose 12-inch or 16-inch joist spacing. This tight spacing prevents thermal sagging. For a direct comparison between synthetic and natural decking, read our guide on composite decking vs pavers for pool decks.
Frost Line Footing Depths and Soil Bearing Capacity
Every support post must rest on a concrete pier. In addition, piers must extend below your municipal frost line. Northern states, frost lines reach 36 to 48 inches below grade. In contrast, southern regions require footings 12 to 18 inches deep. Pouring shallow footings on soil leads to severe frost heave. Ground moisture freezes and causes structural damage. Freezing soil expands and lifts piers unevenly. Consequently, twisted beams and buckled railing posts ruin the deck.
Excavate footing holes using a mechanical power auger. Flare the bottom of each hole to form an 18-inch bell footing. This bell shape doubles soil bearing surface area. Insert cardboard Sonotube forms and suspend two #4 rebar rods inside. Then, pour 3,500 to 4,000 PSI concrete. Always install hot-dipped galvanized post base brackets into the wet concrete. These standoff brackets elevate wood posts one inch above the concrete. Therefore, they prevent post rot from splash-out water.
The 1/2-Inch Clearance Rule: Why Decks Must Be Freestanding
Attaching lumber directly to the pool wall is a catastrophic error. It ranks as the number one cause of pool collapse. An above ground swimming pool is a flexible metal or resin vessel. It holds thousands of gallons of shifting water. A 24-foot round pool holds approximately 13,500 gallons of water, weighing over 112,000 pounds.
When swimmers splash and generate waves, the pool shell flexes continuously. That dynamic movement creates tremendous wall stress. Fastening joists directly to the pool top rail shears structural screws. Furthermore, it twists deck framing beams out of alignment. Worse yet, rigid lumber prevents the pool wall from flexing naturally. Consequently, pool walls buckle and puncture the vinyl liner. A torn vinyl liner unleashes a catastrophic backyard tidal wave in seconds. It destroys landscaping and undermines foundations.
To prevent structural failure, master builders adhere strictly to the Freestanding Isolation Rule:
- Complete Structural Independence: The deck substructure must carry all loads on independent footings. It must remain self-supporting at all times. The frame must stand solid even if the pool is dismantled. It never relies on pool walls for stability.
- The 1/2-Inch Coping Gap: Frame joists to extend over the pool rail. Always leave a 1/2-inch to 3/4-inch gap above the metal coping. Never allow decking boards to press directly against the pool rim.
- Winter Cover Access: Leaving a 1/2-inch gap provides clearance for winter pool covers. In addition, it allows liner bead replacement without removing deck boards.
For additional details on rim framing and border profiles, explore our comprehensive guide on pool coping styles and profiles.
Step-by-Step Framing Blueprint Workflow
Transforming blueprints into a rock-solid pool deck demands a methodical process. Follow this step-by-step sequence:
Step 1: Batter Boards and String Line Layout
Establish the deck perimeter by driving wooden batter boards outside your proposed footprint. Stretch bright mason lines between batter boards. These lines mark the exact outer edges of beams and rim joists. Use the 3-4-5 Pythagorean theorem method to square all corner intersections perfectly. Check diagonal measurements across corners carefully. If both diagonals match, your framing perimeter is perfectly square.
Step 2: Excavating and Pouring Footings
Mark post hole centers directly beneath the string lines using a plumb bob. Excavate all holes to the required frost depth. Pour 4 inches of compacted crushed stone gravel into the bottom of each hole to facilitate drainage. Next, set Sonotubes plumb and backfill dirt around the tubes. Then, pour ready-mix concrete to the top rim. Trowel concrete tops smooth. Then, embed galvanized post anchors aligned with your laser level.
Step 3: Erecting 6×6 Support Posts
Select 6×6 posts rated for ground contact (AWPA UC4A). Southern Yellow Pine and Douglas Fir offer excellent strength. Secure posts into the galvanized metal pier saddles with structural connector screws. Temporarily brace each post plumb in both directions using 2×4 diagonal stakes. Use a laser level to mark a level cutoff line across posts. Be sure to subtract your beam depth from the height.
Step 4: Installing Beams with Structural Notches
Never bolt heavy beams to the flat sides of posts with bolts alone. Downward gravity loads can shear bolt shanks. Over time, downward gravity loads can shear bolt shanks or split post grain. Instead, cut an L-shaped notch into the top of each 6×6 post. This allows the double beam to rest directly on a solid wooden post shoulder. Secure the notched assembly with two 1/2-inch galvanized carriage bolts. Always install heavy iron washers under nuts.
Step 5: Laying Floor Joists and Rim Blocking
Fasten heavy-duty joist hangers along beams at 16-inch or 12-inch centers. Use approved ZMAX galvanized or stainless steel hangers. Slide joists into hangers and fasten using approved structural hanger nails. Install solid lumber blocking every 6 to 8 feet down the center of joist spans. Mid-span blocking prevents joists from twisting under foot traffic. In addition, it dramatically increases deck stiffness.
Step 6: Cantilevering Joists to the Pool Rim
Extend joists outward toward the pool wall. For a round pool, joists must be trimmed to follow the curvature of the pool wall. Measure the distance from the inner support beam to the pool rim, maintaining your 1/2-inch air gap. Snap a curved line across joist ends using a center radius trammel. Then, cut joist ends cleanly with a reciprocating saw.
Step 7: Deck Board Installation and Fastening
Lay decking boards starting from the pool coping and working backward toward the stairs. Butt wet 5/4×6 pine boards tightly together during installation. As boards season in the sun, they shrink naturally to create 1/8-inch gaps. When installing kiln-dried composite boards, use plastic hidden clips. These clips maintain consistent 3/16-inch gaps for drainage. Drive two 2-1/2-inch 305-grade stainless steel composite screws into every joist intersection. For complete finishing details, consult our tutorial on above ground pool deck ideas and framing tricks.
Safety Codes, Guardrails and Self-Closing Gates
Pool decks pose serious safety risks for young children. Therefore, building codes mandate rigorous perimeter barriers. Municipal building departments strictly enforce residential swimming pool codes adapted from ISPSC Section 305.
Guardrail Height and Baluster Spacing
Decks elevated 30 inches above grade require a 36-inch guardrail. However, swimming pool decks mandate taller barriers. Most pool jurisdictions require a 48-inch barrier around the deck. Measure this height from the deck floor to the top rail.
Inspectors apply the 4-Inch Sphere Test across all baluster openings. Vertical spindles must prevent children from slipping through. Specifically, a 4-inch rigid sphere cannot pass through any opening. Furthermore, railings must not feature horizontal climbing rungs. Toddlers can use horizontal members as ladders. Many municipalities ban horizontal cable railings around pools. Building officials classify horizontal cables as climbable ladders. For approved code-compliant designs, review our pool deck railing ideas and codes guide.
Self-Closing and Self-Latching Access Gates
Stairs leading to the pool deck must have a safety gate. In addition, the gate must be self-closing and self-latching. Building codes mandate the following gate hardware standards:
- Outward Swing Direction: The gate must swing outward, away from the swimming pool water. This outward swing prevents children from pushing into the pool area. The gate latches firmly against the stop jamb.
- Magnetic Self-Latching Hardware: Install child-proof magnetic pull latches (such as MagnaLatch). The latch release knob must sit at least 54 inches above grade. This elevation keeps latches out of small children’s reach.
- Heavy-Duty Self-Closing Springs: Equip gate hinges with adjustable stainless steel tension springs. Test the gate from an open position of two inches. It must swing shut and lock under spring tension reliably every time.
For lighting standards along stairs and railings, explore our guide on swimming pool deck lights and low voltage wiring.
Stair Geometry and Tread Construction Standards
Stairs leading to an elevated above ground pool deck experience heavy wet foot traffic. Wet bare feet on wooden treads create slip hazards. Therefore, stair stringers must follow strict ergonomic geometry.
The International Residential Code (IRC Section R311.7) governs exterior stair design:
- Maximum Riser Height: The vertical height between stair treads must not exceed 7-3/4 inches. In addition, riser variations cannot exceed 3/8 inch across the flight. Consistent step heights prevent accidental tripping.
- Minimum Tread Depth: Treads must provide a minimum horizontal depth of 10 inches with a 3/4-inch to 1-1/4-inch nosing overhang. Treads must measure at least 10 inches deep. This provides ample footing for adults carrying pool floats or drink coolers.
- Cut Stringer Spacing: Cut stair stringers from 2×12 pressure-treated lumber. Do not span stair treads wider than 16 inches on center for wood. When using composite decking, space stringers at 12 inches. Cut four identical 2×12 stringers for a 4-foot wide stairway. This robust layout eliminates bouncy, spongy steps.
- Landing Pad Footings: The base of the stair stringers must never rest directly on dirt or lawn. Rest stringers on a poured concrete landing pad. Never place stringer wood directly on bare soil or lawn.
Hardware and Fastener Selection for Pool Environments
Standard zinc-plated or electro-galvanized deck screws deteriorate rapidly around swimming pools. Chlorine splash, muriatic acid, and saltwater mist create corrosive air. Consequently, standard fasteners deteriorate quickly. Fastener failure can lead to sudden collapse of ledger boards or stair stringers.
Corrosion-Resistant Metal Grades
Contractors specify fasteners and structural metal hardware based on the pool sanitation system:
- Traditional Chlorine Pools: Specify G185 hot-dipped galvanized hardware with 1.85 ounces of zinc per foot. Simpson ZMAX brackets meet this standard. Alternatively, use 305-grade or 316-grade stainless steel screws.
- Saltwater Pool Environments: Saltwater pools generate corrosive sodium hypochlorite and sodium chloride aerosols. Galvanized metals corrode within 36 months near saltwater pools. Salt splash accelerates chemical rust rapidly. Always install 304-grade or 316-grade stainless steel hardware around saltwater pools. This includes all screws, brackets, and bolts.
- ACQ Chemical Compatibility: Treated lumber contains high concentrations of copper preservatives. Chemical formulations include ACQ and Copper Azole. Copper preservatives cause galvanic corrosion when touching aluminum or steel. Fasteners can disintegrate within five years. Never let treated wood touch aluminum pool walls directly. Always install an EPDM rubber membrane barrier between surfaces.
Material Cost Breakdown and Lumber Takeoff Table
Accurate material estimation prevents running out of framing lumber mid-build or buying unnecessary excess stock. The budget breakdown table below provides a contractor lumber takeoff for a popular 12ft x 16ft freestanding side splash deck built with Southern Yellow Pine framing.
| Component / Material Item | Quantity & Specification | Unit Cost | Total Estimated Cost |
|---|---|---|---|
| Concrete Pier Footings | 6 Sonotubes (12″x48″) + 24 bags 4000 PSI concrete | $18 per tube / $6.50 per bag | $264 |
| Galvanized Post Bases | 6 Simpson Strong-Tie ABU66 standoff saddles | $28.50 each | $171 |
| Support Posts | 6 pieces – 6x6x10′ Pressure Treated Pine (UC4A) | $38.00 each | $228 |
| Primary Beams | 4 pieces – 2x10x16′ Pressure Treated Pine | $27.50 each | $110 |
| Floor Joists & Rim Boards | 16 pieces – 2x8x12′ Pressure Treated Pine | $16.80 each | $269 |
| Mid-Span Blocking & Bracing | 6 pieces – 2x8x10′ Pressure Treated Pine | $14.20 each | $85 |
| Decking Surface Boards | 38 pieces – 5/4x6x16′ Premium Treated Wood | $15.50 each | $589 |
| Stair Stringers & Treads | 3 pieces 2x12x12′ stringers + 5/4×6 treads | Lump sum lumber | $195 |
| Perimeter Railing & Spindles | 48 linear feet code-compliant railing + aluminum balusters | $24.00 per linear foot | $1,152 |
| Self-Closing Gate Hardware | MagnaLatch magnetic latch + TruClose hinges | Hardware kit | $145 |
| Structural Fasteners & Hangers | ZMAX joist hangers, carriage bolts, ceramic deck screws | Hardware package | $320 |
| Total Estimated Materials | Complete 192 sq ft deck framing package | DIY Material Cost | $3,528 |
If you choose premium capped composite decking boards (such as Trex or TimberTech) instead of pressure treated wood, add $1,800 to $2,800 to the total material budget. Additionally, evaluate protective sealants and heat reduction coatings in our guide on pool deck coatings and sealers.
Plan Sizes, Yard Space, and DIY Building: 8×10, 8×20, and 20×20 Deck Plans
Deck plans come in standard sizes, and the size you pick decides the lumber list, the footing count, and how much of the yard the pool takes up.
8×10 Deck Plans, 8×20 Deck Plans, and 20×20 Deck Plans
8×10 deck plans suit a small above-ground pool: an 8-by-10-foot landing deck with steps on one side gives safe access without a big footprint. A deck plan for 8×20 deck size works for a rectangle pool, with a long side platform for loungers and a short end platform for the ladder. 20×20 deck plans suit a large round or oval pool, giving a full deck on two or three sides with room for a table and chairs. Bigger plans need more footings and longer beams, so check the span tables in this guide before buying lumber.
Free Standing Deck Plans and Deck Framing Diagram
Free standing deck plans describe decks that stand on their own posts and never touch the pool, which is the safe way to build around an above-ground pool. A deck framing diagram shows the post layout, beam runs, joist spacing, and the 1/2-inch clearance gap to the pool wall. Draw the framing diagram first, on paper or in a deck planner, before ordering lumber, because moving a post after the footings are poured is expensive.
How Much Space Do You Need for a Pool and Pool Deck Above Ground Pool Sqft
How much space do you need for a pool depends on the pool size plus the deck and the clearance around it. A 24-foot round pool with a 10-foot deck on one side needs about 24 by 36 feet of yard, plus 3 feet of clear space around the outside for mowing and access. For pool deck above ground pool sqft, multiply the deck length by its width: a 10-by-20-foot deck is 200 square feet, and a full wraparound deck on a 24-foot round pool can reach 600 square feet or more.
Do It Yourself Deck Building, Pool Deck Resurfacing Cost, and Concrete Pool Deck Repair Cost
Do it yourself deck building suits a simple side platform or landing deck, but a full wraparound deck with stairs and guardrails is a bigger job. See our How to Build a Pool Deck guide for step-by-step framing and codes. If the deck is concrete rather than wood, the pool deck resurfacing cost runs about $4 to $15 per square foot depending on the overlay system, as covered in our Concrete Pool Deck Resurfacing guide. The concrete pool deck repair cost for cracks is lower, and our How to Fix Cracks in a Concrete Pool Deck guide covers diagnosis and repair.
Frequently Asked Questions
Hover or tap any question below to reveal the answer.
Do you need a building permit for an above ground pool deck?
Building inspectors review structural post footings, joist spans, 48-inch safety railing heights, and self-closing gate latches to protect public safety.
Can an above ground pool deck touch the pool?
Shifting water weight flexes pool walls, causing fasteners to rip through steel panels. Always maintain a 1/2-inch to 3/4-inch expansion gap between decking boards and pool coping.
How far apart should posts be on an above ground pool deck?
Spanning posts farther than 8 feet requires engineered double 2×12 beams or triple beam laminations to prevent sagging.
What is the best wood for an above ground pool deck?
For surface decking, cedar or capped composite boards offer superior barefoot comfort.
How deep should pool deck footings be?
Depending on your geographical climate zone, footing depth ranges from 18 inches in the South to 48 inches in the North.
Can you build an above ground pool deck with pavers?
Review our comparison on stamped concrete vs pavers for pool decks for retaining wall engineering details.
How much space do you need for a pool and deck?
Measure the pool, the deck, and the clearance before ordering lumber.
Can I build an above ground pool deck myself?
A full wraparound deck with stairs and guardrails is a bigger job, and most homeowners hire a builder for it.