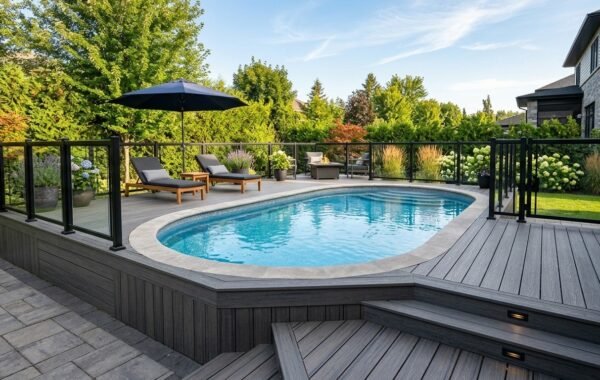

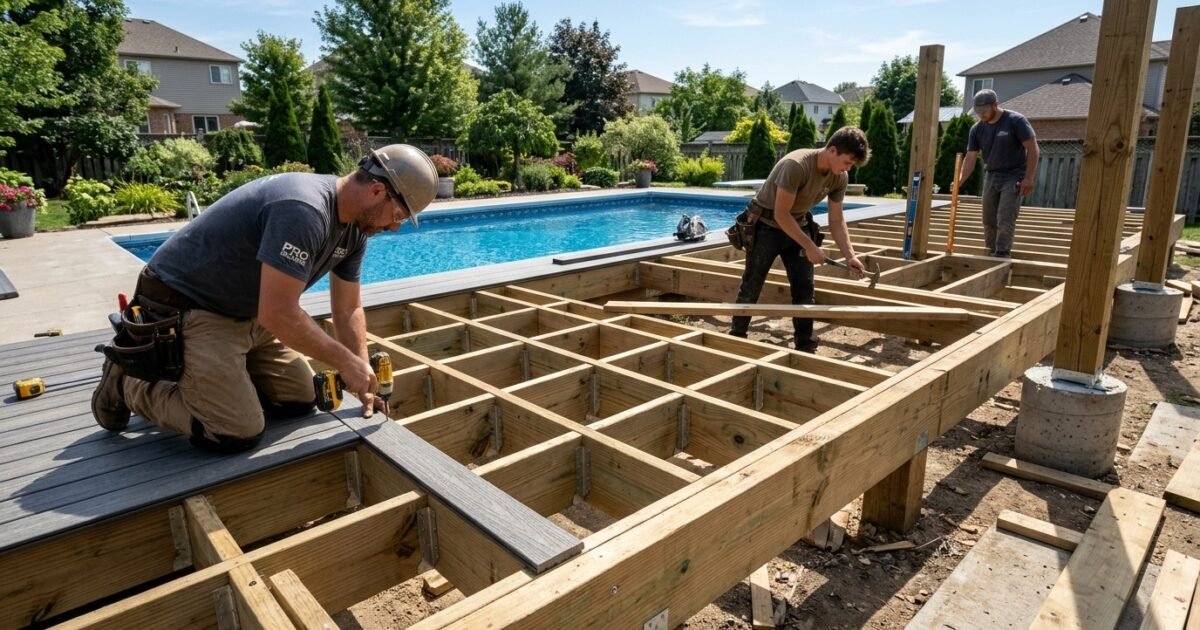
Learning how to build a pool deck transforms an ordinary backyard into a functional summer resort. Constructing your own pool surround saves between $4,000 and $14,000 in general contractor labor fees. However, pool deck framing requires greater structural precision than standard house patios. Water splash weight, dynamic swimmer surges, and frost heave demand engineered framing connections. Most homeowners complete a 300-square-foot build in three to four weekends with standard carpentry tools.
Before buying joist hangers or digging post footings, you must understand municipal building codes. In addition, you must protect framing lumber from relentless pool chlorine and moisture. This master contractor guide teaches you exactly how to build a pool deck from the ground up. You will master soil excavation, concrete pier pouring, notched 6×6 posts, beam cantilevers, non-slip decking installation, and child safety gates.
How to Build a Pool Deck: Build Timeline and Costs
Knowing how to build a pool deck requires planning distinct structural phases. Rushing the foundation or skipping lumber blocking leads to sagging floorboards and failed inspections. The planning table below outlines each construction milestone. It details labor hours, tooling needs, and material expenses for a 16ft x 20ft deck.
| Construction Phase | Estimated DIY Time | Key Tools & Equipment | Primary Materials Needed | Estimated Phase Cost |
|---|---|---|---|---|
| Phase 1: Site Layout & Footings | 12 to 16 hours | Power auger, laser level, wheelbarrow | Sonotubes, 4000 PSI concrete, rebar | $450 to $750 |
| Phase 2: Posts & Primary Beams | 8 to 12 hours | Circular saw, reciprocating saw, impact driver | 6×6 posts, double 2×10 beams, carriage bolts | $650 to $1,100 |
| Phase 3: Joists & Perimeter Cantilever | 10 to 14 hours | Miter saw, framing nailer, speed square | 2×8 joists, ZMAX hangers, structural screws | $800 to $1,350 |
| Phase 4: Decking Surface Installation | 12 to 16 hours | Cordless drill, chalk line, jigsaw | 5/4×6 treated wood or composite boards | $1,200 to $3,200 |
| Phase 5: Guardrails, Stairs & Gate | 14 to 18 hours | Router, level, drill press or guide | 4×4 posts, 2×4 rails, balusters, MagnaLatch | $900 to $1,800 |
| Total Project Scope | 56 to 76 hours | Complete carpentry kit | Full pressure-treated framing package | $4,000 to $8,200 |
Review our guide on how much does a pool deck cost per square foot. It compares labor rates across concrete, pavers, and timber.
Related: Pool Coping Ideas: Modern Styles, Pavers & Costs
Tools and Materials Checklist
Having the correct carpentry tools on site prevents frustrating mid-project delays. Gather these materials before excavation day.
Required Heavy-Duty Carpentry Tools
- Rotary Laser Level: A laser level guarantees consistent footing elevations across uneven backyard terrain.
- Gas-Powered Hole Auger: Digging deep post holes by hand in hard clay causes severe physical exhaustion. Renting a power auger speeds up excavation significantly. Renting an auger saves hours of labor on site.
- Heavy-Duty Impact Driver: Driving structural lag screws into treated wood requires high rotational torque. An impact driver prevents stripped screw heads.
- 7-1/4 Inch Circular Saw with Framing Blade: Used for cutting beams, notching posts, and trimming joist ends.
- Compound Miter Saw: A compound miter saw cuts crisp 90-degree square ends on boards. In addition, it cuts accurate 45-degree railing bevels.
Structural Framing Materials Checklist
- 6×6 Ground Contact Posts: Choose 6×6 posts pressure treated to AWPA UC4A standards. This preservative level ensures structural longevity.
- 2×10 Double Beams: Select #2 Southern Yellow Pine or Douglas Fir for primary beams. Both species deliver superior load bearing strength.
- 2×8 Floor Joists: Kiln dried after treatment (KDAT) lumber minimizes shrinkage. Consequently, joists stay straight and true.
- ZMAX Galvanized Joist Hangers: Heavy zinc coatings resist pool splash and high humidity. Simpson ZMAX brackets deliver excellent protection.
- 305-Grade Stainless Steel Screws: Use stainless steel screws for securing decking boards. They prevent black rust staining around screw heads.
Phase 1: Excavation, Footings and Pier Layout
When planning how to build a pool deck, the foundation carries the entire structural weight. Mistakes during excavation create crooked railings and sagging deck boards later. Take time to verify all dimensions.
Marking Batter Boards and String Lines
Never rely on pool walls to establish square corners. Instead, drive wooden batter boards four feet outside your deck perimeter. This offset protects your layout lines during digging. Stretch nylon mason twine between opposite batter boards. Next, apply the 3-4-5 rule to ensure corners form true right angles. Accurate right angles keep joists aligned. Measure diagonally from corner to corner. Measure diagonally from corner to corner. When both diagonal measurements match, your framing rectangle is square.
Digging Below the Municipal Frost Line
Check with your building department for exact frost line rules. Depth requirements vary by region. Northern climates require footings 36 to 48 inches deep. In contrast, southern regions permit 12-inch to 18-inch piers. Digging below the frost line prevents frost heave. Freezing soil cannot lift or tilt your deck piers.
Shovel four inches of crushed stone into the base of each hole. Gravel drainage prevents standing water under concrete. Next, lower 12-inch cardboard Sonotubes into the excavations. Plumb each tube using a four-foot level. Backfill soil around the tube exterior to steady it. This prevents the cardboard form from shifting during concrete pouring.
Pouring 4,000 PSI Concrete and Setting Post Anchors
Mix 4,000 PSI high-strength concrete in a rented electric mixer. Pour concrete into the Sonotubes in 12-inch lifts. Consolidate each lift with a wooden rod to eliminate trapped air pockets. Screed the top concrete surface smooth with a margin trowel. Shape a slight crown to shed rainwater away from the post base.
Immediately embed galvanized standoff post bases into the wet concrete. Verify height with a laser level. Align each bracket with your overhead string lines. These metal standoff saddles elevate wood posts one inch above concrete. Therefore, posts stay dry and rot-free. Standing water cannot soak into end-grain wood pores. This simple detail prevents premature fungal rot.
Phase 2: Notching 6×6 Posts and Mounting Heavy Beams
Primary beams transfer all floor and swimmer loads into the concrete footings. Beams must support heavy dynamic loads. Bolting beams to the flat sides of posts violates modern codes. Through-bolts alone can shear under heavy loads.
Cutting Shoulder Notches on 6×6 Posts
Vertical posts must provide a solid wooden shoulder for beams. This direct bearing prevents joint failure. Mark a 3-inch wide by 9-1/4-inch deep notch on the top of each 6×6 post. This notch cradles a double 2×10 beam perfectly. Set your circular saw blade depth to three inches. Make multiple parallel circular saw cuts through the notch area. Then, knock out the wood waste with a sharp framing chisel.
Coat all fresh cut wood surfaces with copper naphthenate preservative. This chemical treatment stops wood decay. Preservative prevents fungal decay on exposed interior lumber fibers. Never skip treating field cuts. Place the double 2×10 beam squarely into the post notch. Then, drill two 1/2-inch clearance holes through the assembly. Insert galvanized carriage bolts with heavy washers. Then, torque nuts securely using an impact wrench.
Beam Splicing Rules Over Support Posts
When deck spans exceed 16 feet, splice beams from multiple boards. Plan your post positions carefully. Never splice beam joints in mid-air between posts. Spliced joints require direct post support. All beam butt joints must rest over the center of a 6×6 post. Direct bearing maintains structural strength. Furthermore, stagger beam joints between plies. The outer and inner 2×10 plies should never splice over the same post.
Phase 3: Floor Joist Layout, Spacing and Blocking
Floor joists support the decking boards where swimmers walk. Properly spaced joists create a firm, solid deck. Proper joist spacing prevents flexible, springy floorboards. Stiff floors make walking comfortable.
Joist Spacing for Wood vs Composite Decking
Space floor joists at 16 inches on center for 5/4×6 treated pine decking. This layout supports standard foot traffic. When installing composite boards or PVC decking, reduce joist spacing to 12 inches. Tight spacing prevents deck sagging. Composite boards soften under hot summer sunlight. Wide joist spans cause noticeable sagging between supports.
Secure joists to beams using metal joist hangers. Always fasten hangers with 1-1/2-inch structural connector nails. Never use drywall screws or brittle wood screws to hang joist hardware. Brittle screws snap under shear stress. Structural nails provide high shear strength. They resist dynamic pool vibrations and wind uplift.
The Critical 1/2-Inch Pool Coping Clearance
As emphasized in our blueprints guide on above ground pool deck plans and sizing, the deck must remain completely freestanding. Frame joists to cantilever over the pool top rail. Maintain a uniform 1/2-inch to 3/4-inch air gap above the coping.
Never screw decking boards or ledger lumber to the pool wall. Shifting water weight damages steel panels. Swimming pool shells flex under water displacement. Rigid connections rip pool liners and twist deck framing. Attaching wood to pool coping causes metal tearing and liner failure. Independent framing prevents structural damage. In addition, the 1/2-inch clearance allows easy pool cover installation. You can slip winter cables under the deck rim.
Installing Mid-Span Solid Blocking
Cut solid 2×8 lumber blocks from scrap joist material. Solid blocking strengthens the entire floor frame. Install rows of solid blocking down joist spans every six to eight feet. Mid-span blocking prevents joists from rotating. Stagger blocking slightly across joists. This offset allows direct face-nailing through each joist bay. Solid blocking prevents joists from rotating under foot traffic. Consequently, your deck feels solid underfoot.
Phase 4: Deck Board Fastening and Border Profiles
The walking surface defines the beauty and comfort of your pool project. Take time to install boards cleanly. Poor board spacing leads to water pooling and cupping. Proper gaps allow rainwater to drain immediately.
Board Spacing and Moisture Acclimation
Check the moisture content of your decking lumber before fastening. Wet treated pine delivered from lumber yards contains high moisture content. Install wet boards with tight joints. Install wet treated boards with tight joints. As boards dry in the sun, they shrink to leave 1/8-inch drainage gaps. Sun drying shrinks treated pine boards naturally. This shrinkage creates clean 1/8-inch gaps between boards.
When installing kiln-dried wood, cedar, or composite decking, leave a 3/16-inch gap between boards. Use plastic spacer shims. Proper spacing allows splash water to drain quickly beneath the deck. Good drainage prevents algae growth. For comprehensive drainage strategies, read our guide on pool deck drainage and slope standards.
Screw Selection and Fastening Technique
Fasten decking boards using 2-1/2-inch stainless steel screws. Grade 305 or 316 screws resist pool chemicals indefinitely. Stainless steel fasteners resist chlorinated water and acidic chemicals. They never corrode or leave rust stains. Drive two screws into every joist intersection. Keep screws one inch inward from board edges to prevent splitting. Always countersink screw heads slightly below the wood surface. Smooth screw heads prevent scratches on bare feet.
Trimming the Pool Perimeter Radius
Let decking boards run long over the pool edge during installation. You will cut the final curve in one smooth pass. Once all boards are secured, mark the final curved pool radius. Use a center radius trammel string. Anchor a pencil to a string pinned to the center of the pool. Swing the pencil in a smooth arc across boards. Maintain your 1/2-inch clearance gap as you mark the arc. A smooth radius line ensures a clean appearance. Cut along the pencil line using a handheld jigsaw. Then, sand the cut edge smooth with 80-grit sandpaper.
Phase 5: Guardrails, Safety Latches and Stairs
Swimming pool safety codes protect children from accidental drowning. Municipal building inspectors enforce strict barrier rules. Inspectors examine railings, gates, and stair dimensions with extreme scrutiny. Always build to code.
48-Inch Pool Barrier Code Requirements
Residential codes adapted from the International Swimming Pool and Spa Code (ISPSC) require a 48-inch barrier. Measure height from the deck floor to the top rail. Measure railing height vertically from the finished deck floor to the top rail. A 48-inch barrier prevents climbing accidents.
Install 4×4 guardrail posts spaced no more than six feet apart. Fasten posts to rim joists with carriage bolts. Fasten each post using two 1/2-inch galvanized carriage bolts. Heavy washers ensure a solid mechanical connection. Never notch railing posts. Notching reduces post bending strength by more than 50 percent and fails code inspections. For code-compliant railing architectures, review our contractor guide on pool deck railing ideas and codes.
The 4-Inch Baluster Sphere Test
Space vertical railing balusters less than four inches apart. Tight spacing prevents small children from slipping through. Inspectors test railing openings with a rigid four-inch sphere. The sphere must not pass through any opening. If the sphere passes through balusters, the railing fails inspection. Accurate spacing protects young children. Furthermore, balusters must remain strictly vertical. Vertical spindles eliminate climbing footholds. Horizontal wires or rails form dangerous climbing ladders for curious toddlers. Avoid horizontal railing designs around pools.
Building Safe Stair Stringers
Stairs leading to the elevated deck endure heavy wet foot traffic. Build wide, comfortable step stringers. Cut stair stringers from 2×12 pressure-treated lumber using a framing square and stair gauges. Precision cuts guarantee uniform steps:
- Maximum Riser Height: Keep individual step risers between 7 inches and 7-3/4 inches tall.
- Minimum Tread Depth: Cut tread depths to a minimum of 10 inches to provide stable footing for bare feet.
- Four-Stringer Layout: Cut four parallel 2×12 stringers for a 4-foot wide stairway. This spacing prevents stair treads from sagging under heavy loads. Four stringers eliminate spongy steps under heavy adult weight. The staircase feels exceptionally solid.
- Concrete Landing Pad: Rest the base of stair stringers on a poured 4-inch concrete pad. Never place stringer wood directly on damp soil. Soil contact rots wood stringers quickly. A concrete landing pad protects the base from moisture.
Installing a Self-Closing Safety Gate
All access stairs must feature an outward-swinging safety gate. Outward swing prevents children from pushing into the pool area. Equip the gate with self-closing tension hinges and a magnetic pull latch (such as MagnaLatch). Springs must pull the gate shut reliably. Position the latch release mechanism at least 54 inches above grade. This height keeps latches out of toddlers’ reach. Test the gate from a 2-inch open angle. It must swing shut and latch securely without assistance.
Sealing, Staining and Slip Resistance Treatments
Unprotected wood deteriorates quickly under ultraviolet sunlight and chlorinated splash-out. Protective sealers preserve lumber fibers. Applying a protective coating preserves wood grain and prevents painful splinters. Sealers extend deck lifespan significantly.
Moisture Testing Before Sealing
Never apply sealer to wet, newly installed treated lumber. Preservative moisture must evaporate first. Treated wood requires three to eight weeks of dry summer weather to season properly. Test moisture before staining. Test wood moisture using the simple splash test. Drizzle water droplets onto the deck floor. If water beads on the surface, the wood is still saturated with preservatives. Wait another two weeks before applying sealer. When water droplets soak into wood pores within 60 seconds, the deck is ready for staining. Penetrating stains will absorb fully.
Selecting Penetrating Hydrophobic Sealers
Choose an exterior penetrating oil stain or silane-siloxane sealer. Penetrating formulas soak deep into wood cellular structures. Penetrating formulas soak deep into wood cellular structures without forming a brittle surface film. They never crack or peel. Consequently, penetrating sealers never bubble, crack, or peel under heavy foot traffic. Maintenance requires simple recoating. For concrete and masonry surrounds, explore top formulas in our guide on pool deck coatings and sealers.
Adding Micronized Non-Slip Texture
Wet wooden decks become slippery around pool access stairs. Adding texture prevents slip and fall injuries. Blend micronized polypropylene anti-slip polymer beads (such as SharkGrip) into your final sealer coat. Mix thoroughly before rolling. Broadcast textured beads at a ratio of 3 to 4 ounces per gallon of stain. The beads disperse evenly across the deck surface. The tiny spherical beads create a subtle sandpaper-like texture. This finish provides exceptional wet grip without scratching bare skin.
Permitting, Inspections and 5 Costly DIY Mistakes
Securing a building permit protects your investment and maintains insurance coverage. Permitted work guarantees code compliance. Building inspectors typically perform three distinct on-site inspections:
- Footing Hole Inspection: Inspectors check hole depth against the municipal frost line before you pour concrete. Never pour concrete before this check.
- Framing & Hardware Inspection: The framing inspection occurs before laying deck boards. The inspector verifies lumber sizing, joist hangers, and carriage bolts.
- Final Inspection: The final inspection verifies railings, stairs, and self-closing gates. The inspector tests gate latching tension and baluster spacing.
5 Costly Mistakes to Avoid in How to Build a Pool Deck Projects
- Mistake 1: Connecting Lumber to the Pool Wall: Sinking screws into pool top rails causes wall failure and liner tears. Always build a freestanding structure.
- Mistake 2: Shallow Footings: Pouring concrete piers above the frost line leads to severe frost heave that twists beams and railings.
- Mistake 3: Bolting Beams to the Sides of Posts: Through-bolting beams without cutting an L-shaped post shoulder violates modern building codes.
- Mistake 4: Using Interior Screws: Standard gold screws corrode within two seasons when exposed to pool water. Always use 305-grade stainless steel or ZMAX galvanized fasteners.
- Mistake 5: Neglecting Gate Self-Closing Hinges: Gates that fail to latch automatically pose grave drowning risks for neighborhood children.
Frequently Asked Questions
Hover or tap any question below to reveal the answer.
How much does it cost to build your own pool deck?
In contrast, hiring a professional contractor costs ,000 to ,000 for the same footprint.
Do I need an engineer to design a pool deck?
However, multi-tier decks elevated over eight feet often require stamped engineering drawings.
Can you build a pool deck without digging footings?
Surface foundation blocks shift under pool splash weight and heave during winter freezes.
What is the easiest pool deck to build?
It requires zero curved cuts, straightforward perpendicular framing joists, and only six support posts.
How long does pressure treated pool decking last?
Can you put a hot tub on a pool deck?
A hot tub weighs 4,000 to 6,000 pounds, requiring dedicated concrete pads or heavily reinforced framing engineered for 100 PSF live load.